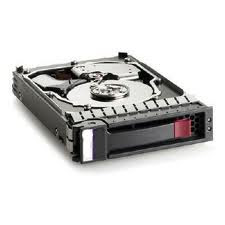
How to install disk drives in the enclosure of HP Storage Works D2700 Disk Enclosure?
The D2700 Disk Enclosure is Flexible/ Scalable by allowing the customer to grow storage capacity easily by attaching up to two D2700 enclosures from a single Controller port, for expansion of up to 4 enclosures or 100 drives, allowing for room to grow as storage demands increase.
Disk drive options:
The
HP Storage works D 2700 disk enclosure models can support 12 or 25
disk drives depending on the model configuration supported up to 25 x
1.2TB capacity.
Disk drive guidelines:
Take care while handling disk drives. Internal
drives can be damaged when drives are shaken, dropped, or roughly placed on a
work surface.
• When installing a disk drive, press firmly
to make sure the drive is fully seated in the drive bay and then close the
latch handle.
• When removing a disk drive, press the
release button and pull the drive only slightly out of the enclosure. Then, to
allow time for the internal disk to stop rotating, wait approximately 10 seconds
before completely removing the drive from the enclosure.
• Populate
hard drive bays starting with the lowest bay number. If only one hard drive is
used, install it in the bay with the lowest device number.
• Disk
drives are hot-pluggable.
• SAS and
SATA disk drives may be installed in the same enclosure, but can not be
included in the same RAID logical volume.
Installing a disk drive:
Remove the
drive blank.
Unlatch
and swing out the latch handle on the drive. Then, slide the drive into the bay
pressing firmly on the drive to seat it. Close the latch handle, pressing
firmly until it locks in place.
When a
drive is inserted in an operational enclosure, the drive LEDs flash to indicate
that the drive is seated properly and receiving power
3.Determine the status of the hard
drive.
For proper airflow and cooling, a
drive blank must remain installed in all unused drive bays.
How to recognize disk drive failure?
In an HP
enclosure, a steadily glowing fault LED indicates that a disk drive has failed.
Other indications of failed disk drives are
• ACU
represents failed drives with a distinctive icon.
• HP SIM
can detect failed drives remotely across a network. (For more information about
HP SIM, see the documentation on the Management CD.)
• ADU
lists all failed drives. • Operating System log files.
How to handle disk drive failure?
Determine
which physical drive failed. On hot-plug drives, an amber drive failure LED
illuminates.
If the unit containing the failed drive does
not support hot-plug drives, perform a normal shutdown.
Remove the failed drive and replace it with a
drive that is of the same capacity.
If the drives are hot -pluggable., after securing the
drive in the bay, the LEDs on the drive each flash once in an alternating
pattern to indicate a successful connection.
The online LED flashes, indicating
that the controller recognized the drive replacement and began the recovery
process.
Power on the server.
The controller reconstructs the information on
the new drive, based on information from the remaining physical drives in the
logical drive.
While reconstructing the data on hot-plug drives, the online LED
flashes.
Once the drive rebuild is complete, the online LED is illuminated.
Serverental
is committed to delivering businesses with the most straightforward and
dependable IT Solutions and technical support. Whether you are looking for
short term or long term rental, Serverental had many rental options to meet
every kind of business need.
Serverental
offers the best service and competitive rates on high-end servers, Rack
Servers, EMC, Dell and NetApp Storage on Rental. We deal with top
manufacturers like IBM, HP, DELL and SUN and We offer server rentals in
Bangalore, Mumbai, Delhi, Chennai, Hyderabad, and Pune.
Please
contact me at +91 98866 99666 or sales@serverental.com
Please
visit our website for more details: http://www.serverental.com/


Comments
Post a Comment